In This Chapter
Not all ‘Good’ holds are the same
Cairn uses sound to communicate a lot of information, one piece of which is the quality of a hold. A good hold makes a decisive thump or scrape sound. There are a few varieties that change based on hand or foot and what type of hold it is, but after a while you’ll be able to distinguish whether you’re on a ‘good’ hold or not from the sound. Also, bad holds have their own distinct sounds- coupled with the sight and sound of a small amount of gravel falling. While this is great game design, the people wanted more. They requested more clear info about hold quality and during the demo the ‘Hold Feedback’ option was introduced. This setting briefly displays a white box around a hand or foot that just found a ‘Good’ hold. Referring to our Debug Overlay Wall’O’Text we know that a “Good” hold is simply one the game classifies as ‘Normal’. More importantly this means that hold is not subject to the RNG of the ‘Slippery’ or ‘VerySlippery’ states. These states not only increase the chance to slip, but also add a modifier that variably increases stamina consumption. The degree to which stamina burn rate is penalized scales with how bad the hold type and condition are, the angle of the limb relative to her torso, and her overall position.
Unfortunately, what this all means is that four good holds does not automatically put her in a stamina-positive position. It simply means that you have four holds that won't slip, and more importantly- four holds that aren’t subject to additional stamina penalties. Those holds are still subject to a stamina rate (positive or negative) commiserate with their specific qualities and her overall position. For example, you can easily find four good holds on the underside of a roof, but that is not a stamina-positive situation. I’ve seen a lot of frustrated climbers bemoan a fall from four good holds, when the reality is this: position is king. Even with no additional stamina burn rate penalties you can find four good holds and be in an overall stamina-negative situation based on her current position and the stamina state at which you arrived in that position.
So, what I truly mean by “Not all 'Good' holds are the same” is that regardless of hold quality all holds are subject to the physics of Aava's overall position and that the true driver of a good position is more about the type of holds (big jugs vs slab) for all four limbs and how those holds apply force and direction onto Aava’s torso combined with the overall slope of the pitch.
Buffs
While I think most that take the time to read this guide are pretty familiar with the buffs in game, I wanted to review what the climbing-specific buffs actually affect now that we’ve discussed the core mechanics.
-Grip/Chalk: Reduces stamina drain, slip chance, and rain penalty from all holds. Both these buffs also increase total limb stamina. Arms gain 25% and legs gain 30% more stamina. This increase doesn’t stack.
-Focus: Increases the rate of stamina gain and reduces the delay for limbs to start regenerating.
-Boost: Speed is safety and moving between holds quicker can help clear tough cruxes.
That’s it. The three pair very well together obviously and are coupled in many recipes for that reason. Now if you’re in a situation where you have to choose one, you can make the most relevant choice for that route.
Full Rest
We’ve learned that maintaining limb stamina is the key to a successful climb. If a limb sits at critical stamina (debug stamina bar showing zero) the screen darkens, the camera zooms, and within a few seconds she falls. When we’re getting near critical stamina on one or more limbs it’s imperative to improve her position- and with quick, decisive moves coupled with an understanding of the terrain and holds, you can typically get her to a position in which she will rest and eventually fully recover all limb stamina to 100%.
Going forward I will refer to this as a ‘Full Rest’. To understand her current stamina status without the Debug Overlay we’re solely at the mercy of the devs' truly inspired use of diegetic sound- Aava’s breathing. Her breathing (and somewhat new HUD audio display ♥️) is the main form of information about limb stamina the player receives. The faster her breathing the more desperate her stamina condition. And if you’re able to get Aava into a comfortable, ‘safe’ position you’ll hear a few variations of her respiration slowing and eventually a big long exhale. About a second after the end of the last big exhale, all limb stamina is at 100%. Understanding how and where to find these Full Rest positions is a significant step in unlocking harder routes or long Free Solo climbs. For vertical climbs with consistent good holds, finding a Full Rest is typically fairly easy. If her stamina is somewhat stressed and you stop climbing while on 3 or 4 decent holds and she’s not contorted at a weird angle, odds are you’ll eventually trigger one. What we’re more concerned with is how to get a Full Rest in less than ideal positions and we have a few tools to help us do so. First, we know that when we release one limb, typically an arm- we can move that limb around to adjust Aava’s body position. One of the most effective moves is to release one arm and move it down towards her feet. This does a number of things- it puts more weight onto her feet thus increasing their contribution without much added effort, it also puts more weight onto the remaining hand still attached and increases its contribution to effort ratio as well, and finally we also know that a free limb always gains stamina. Let’s take a look at some more pictures with the Debug Overlay to show it in action:
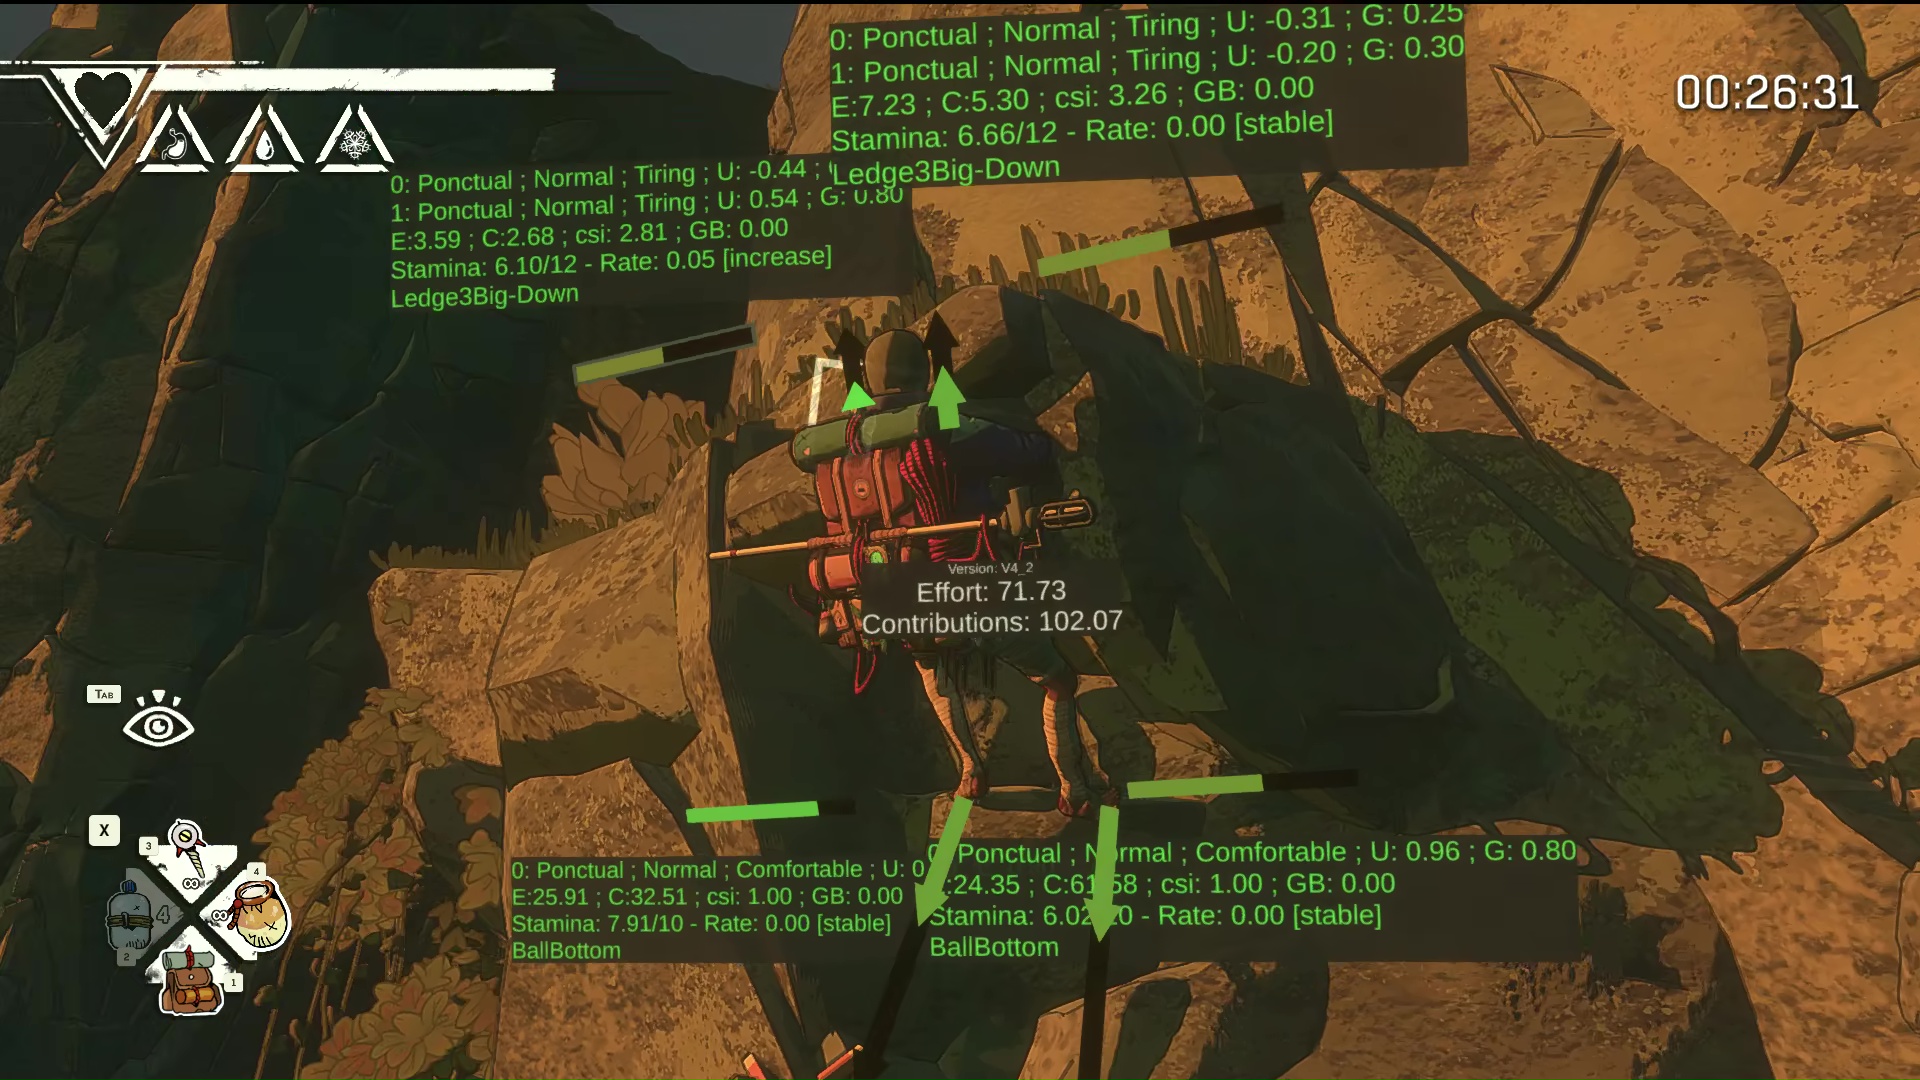
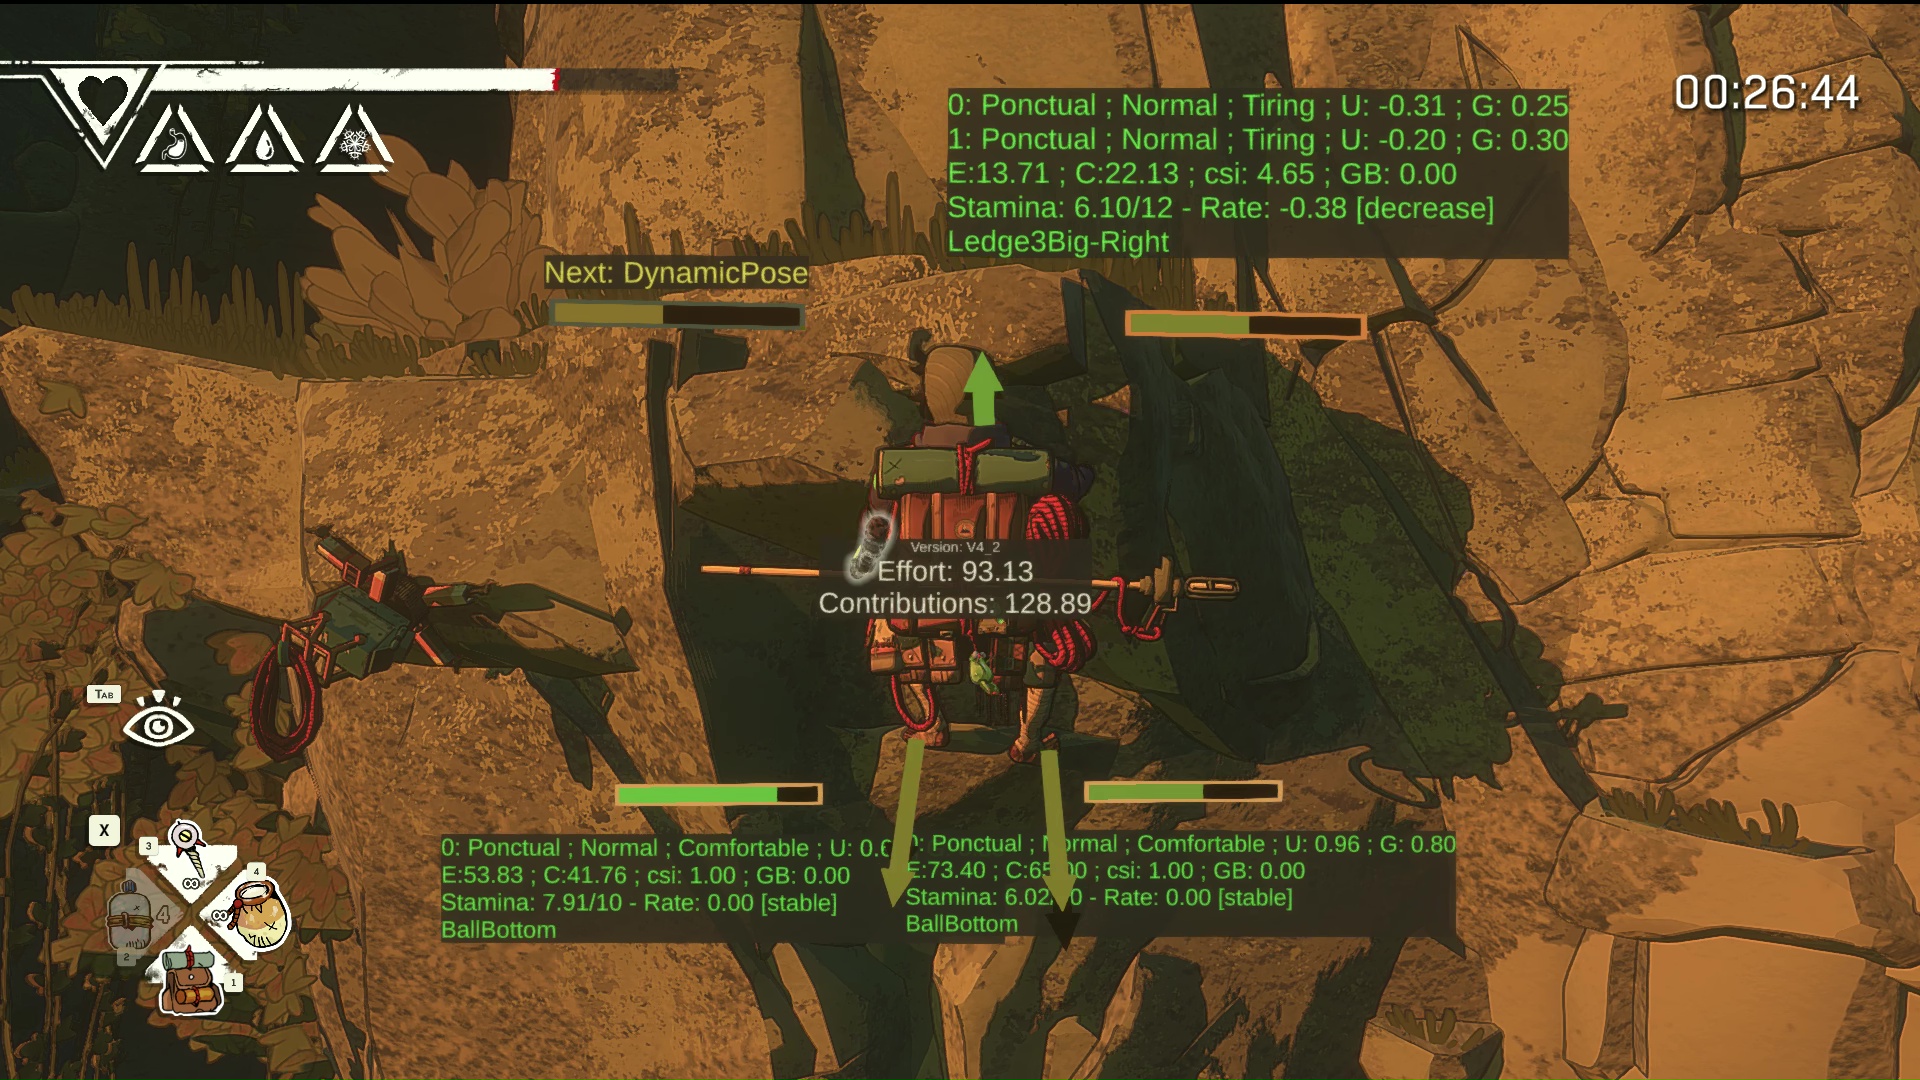
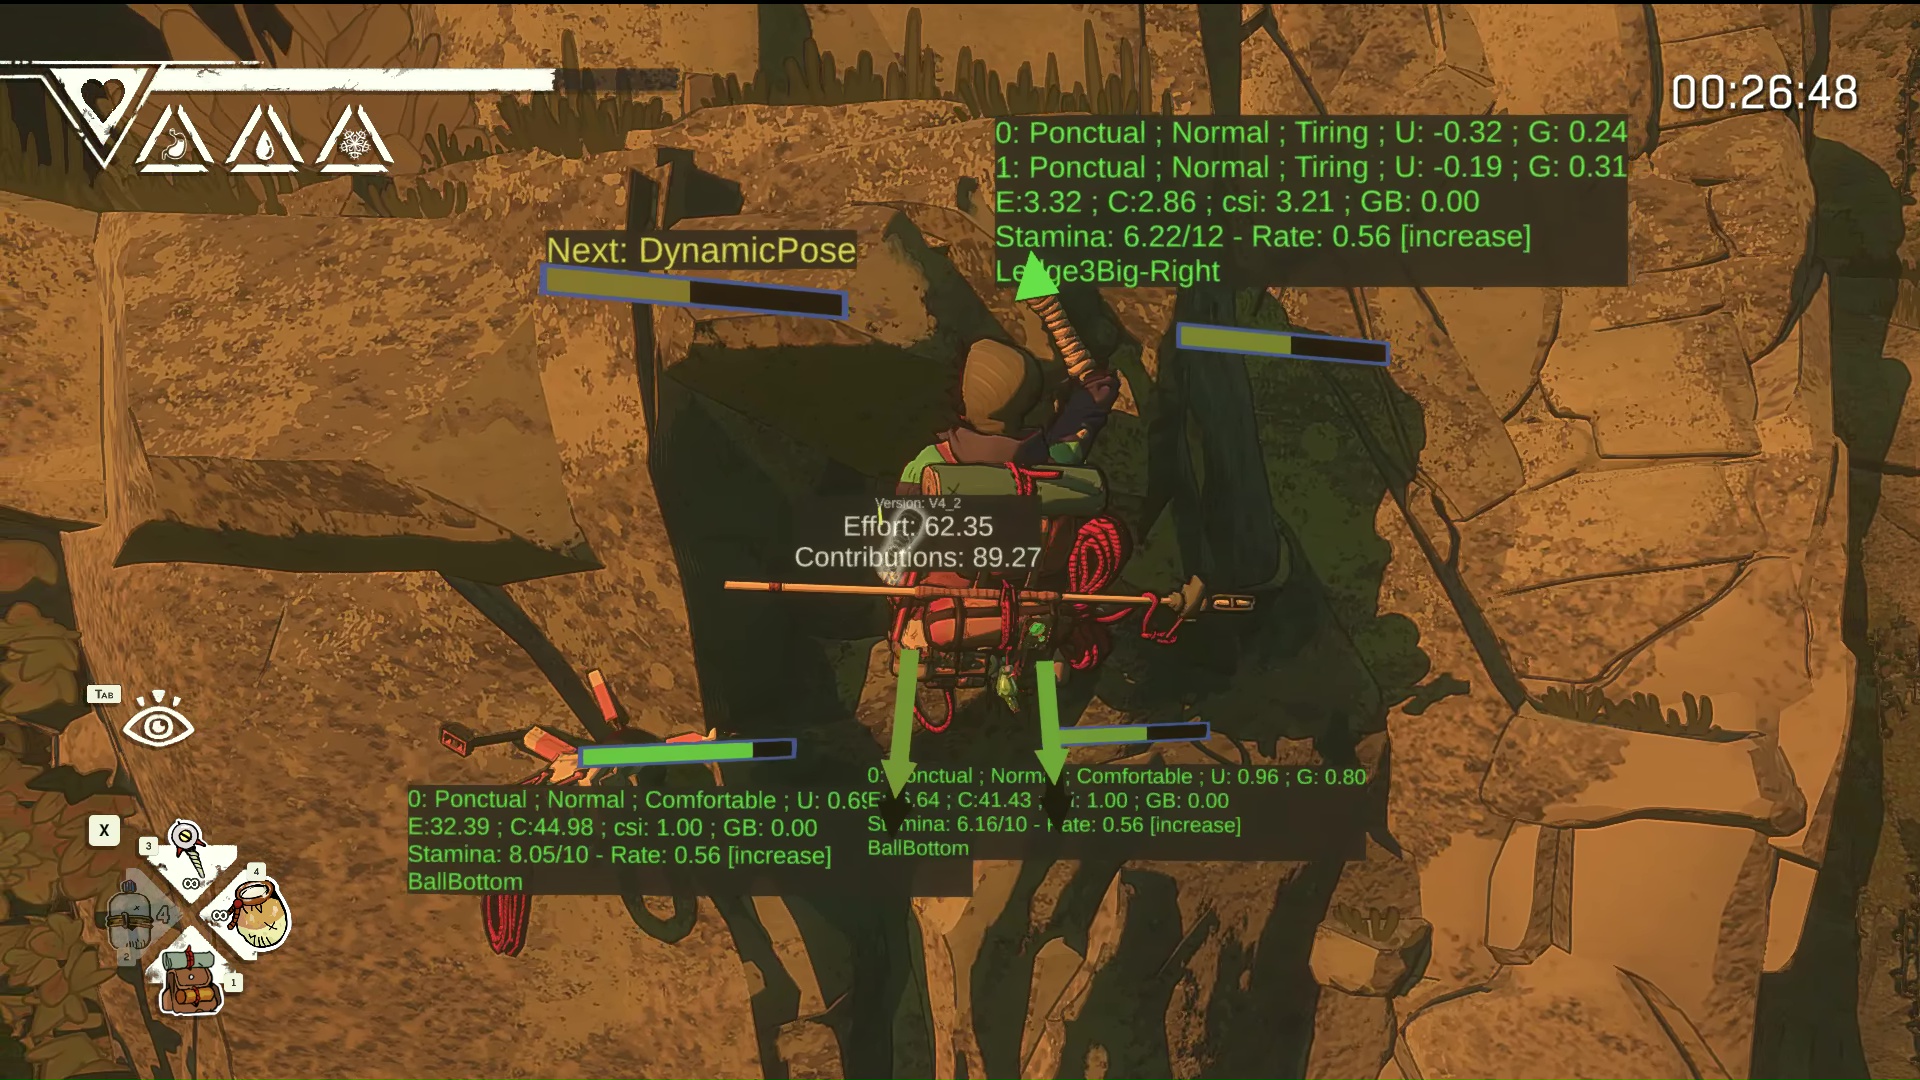
The factors that went into this full rest were:
-Arrived at the position with decent stamina all around, 50% is pretty good and left leg started strong.
-The position, while over hanging, is square. She is not reaching or bending for a hold, her weight is mostly squared up vertically across the 4 limbs.
-We utilized free limb stamina gain coupled with maneuvering her body to put more weight on her feet.
Let’s discuss another situation where we can create full rest in less than ideal conditions. For those of you who have spent lots of time on The Peril you’ll be familiar with the big hanging stalactites. You can climb these, they even have good holds, but finding a rest is difficult as the edges are such small holds that they almost all drain stamina.
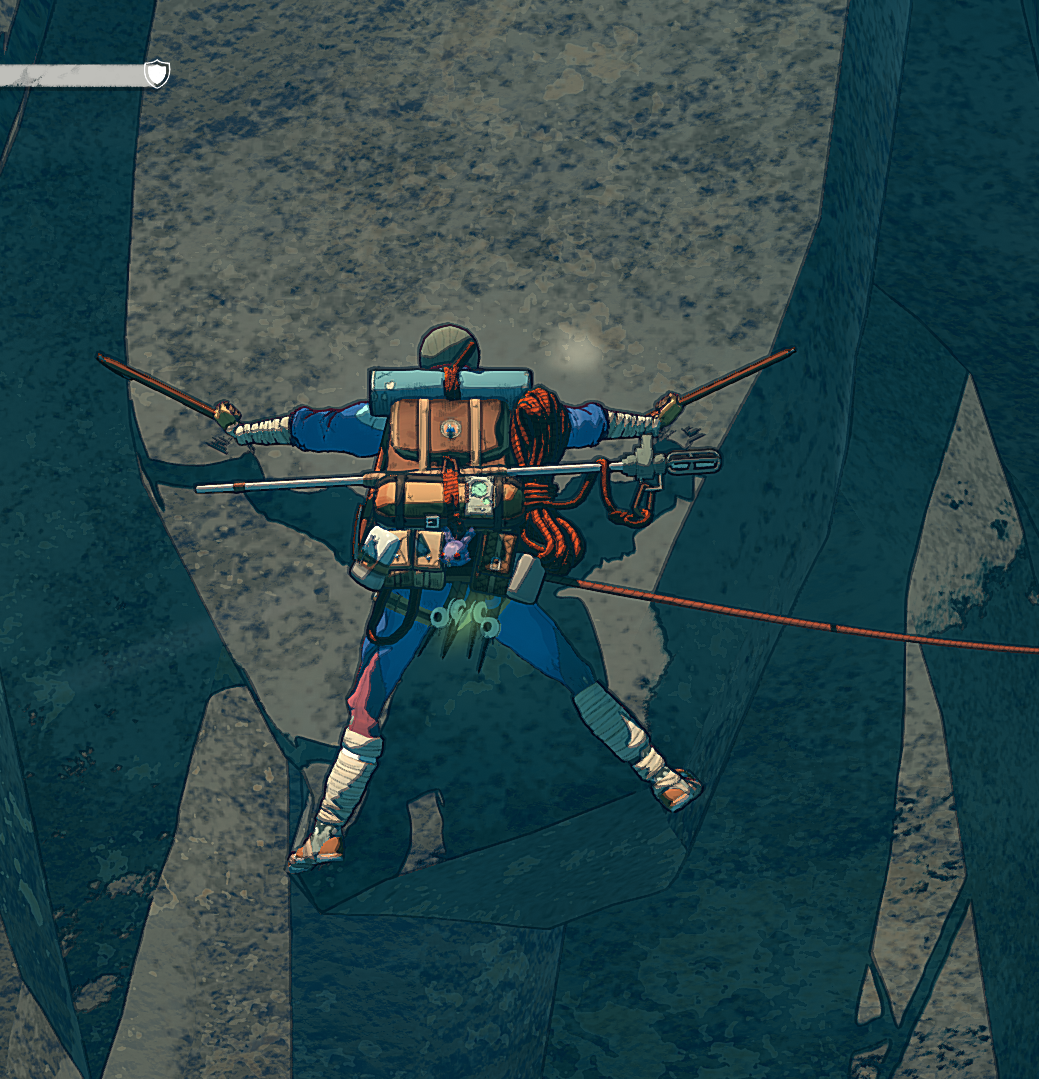
Since the foot holds are quite a bit worse than in our first example, we can’t rely on them to gain stamina by lowering her body position. Instead we have to take advantage of a free limb gaining stamina. We repeatedly manually select and release all 4 limbs and listen to her breathing. Sharper, faster breathing upon release means that limb was more important and now the other 3 limbs are struggling. We rotate through free limbs and try to target limbs that are shaking or do not drastically increase her breathing rate when released. We can sometimes shift her weight a bit left or right. In the pic above, putting both hands to the left corner then both hands to the right corner, back and forth will slowly raise the stamina in both arms. This increased stamina then gives us more time and leeway to release each foot for a longer time to allow it to regain stamina. This is a slow process that doesn’t always work, but can result in a strategically important Full Rest that opens up the rest of the route.
Check out this video for an example of the process: Paz Tech - Full Rest
Sometimes certain Full Rest positions are intermittent. That is, you’re trying a hard climb and get her to rest, but on subsequent attempts she just won't slip. This is typically a couple of factors such as:
-Survival stats- lower HP, Thirst, Hunger, Finger health all lower her stamina and grip to varying degrees and make it harder to find neutral or a stamina positive position that will lead to a rest.
-Efficiency of the approach- lower stamina gives you less time and leeway to get her into a more comfortable position.
-There does also seem to be a bit of a randomness factor here as well, especially in slab or positions with 2-3 limbs not on good holds.
In all honesty- I don’t fully understand all the factors that trigger a full rest, but the consistent aspects seem to be:
-3 / 4 limbs are at least maintaining stamina if not gaining at least slightly. You can have 1 limb actively losing stamina, but that’s it.
-Even if a limb is free, you’re not moving it. Moving a limb guarantees she won't Full Rest.
-All limbs have at least some stamina- if you’re in the critical, zoom / darken state from just one bad limb there’s no way she’ll Full Rest unless you Limb Shake and/or improve the position.
-At least one limb has 75% or less stamina. There are weird cases where if you’re in a stamina-neutral position with generally high limb stamina, she’ll never Full Rest, but you can manipulate her, limb by limb, to effectively have 90%+ on all limbs. Seemingly when you’re already at high limb stamina, a Full Rest won’t trigger. In these situations you’ll notice that her breathing is very slow and calm, no limbs are shaking and she can maintain that for a long time. The breathing is really the key and recognizing when she’s at high stamina- even if it’s not a full rest- is important.
The ‘Recover Stamina’ Skill
In the Gym tutorial we are taught to press Y/Triangle/Q to ‘Recover Stamina’. We do so, she flashes green and takes a deep breath and….that’s it. Whether the Devs intentionally left this vague to fit in with the diegetic nature of the other information systems is unclear, but of course more research was needed. Once again, debug overlay helped us to understand what that skill actually does. When ‘recharged’ the skill offers two charges- the first press makes her flash greenish-blue, take a deep breath, and sets all limbs to a minimum of 50% stamina. A second press makes her flash yellow, give a short exhale sound, and sets all limbs to a minimum of 30% stamina. A third press makes her desperately wipe her brow, does not make her flash any color, and has no effect on stamina. This third and all subsequent presses before the skill recharges are largely a waste of time as her stamina is still draining during the animation.
If you press the button while all limbs are above 50% stamina she will do a quick animation and take a breath, but there’s no color flash and no stamina recovery. The first use, ‘Green’ only triggers when at least one limb is below 50% stamina. If three limbs are at 60% and one limb is at 45%, the first use will set that one limb to 50% and have no effect on the other three. If all limbs are at 1% stamina, the first use sets all limbs to 50%- choose your timing wisely. The second use, ‘Yellow’ has a similar rule. It will only trigger when at least one limb is below 30% and sets all limbs to a minimum of 30%.
The harder mechanic to suss out was how this skill recharges. Many hours were spent on testing and researching this particular aspect and while I am confident that there are consistent, actionable take-aways- it’s not fully understood.
The first and most important piece to know is after the first press ‘Green’ there is a hidden 40 second timer until it can be triggered again. Whether a similar 40 second timer for the second press ‘Yellow’ exists or not is uncertain as a ‘Green’ will always reset and thus trigger first. The second and third presses do not reset the 40 second timer.
The nuance here is that the previous rules all still apply. You can use the first press, gain 50% to all limbs, move into a slightly better position where she’s maintaining at say ~55% stamina on all limbs and the skill won’t ever trigger again even after 40 seconds as no one limb is below 50%. Another scenario is you use first press ‘Green’ and then lose a bit of stamina, but hold at around 40%. The second press ‘Yellow’ won’t trigger as you don’t have any limbs at less than 30% so you’re forced to wait the full 40 seconds. Neither of these is necessarily a dangerous position, but situations in which the recharge behavior is not super clear.
Other methods of recharging this skill are pretty easy to understand. Hanging from a piton, stepping off a route and beginning climbing again, and achieving a Full Rest all recharge the Recover Stamina skill.
The last method is that you naturally regain stamina on all limbs back above 50% from below approximately 30%- without a full rest. Going from 45% up to 55% doesn’t seem to trigger this recharge, you have to recover from low stamina, around 30% or lower on all limbs to get this reset. This one is rare as usually by the time you get into a position to regain stamina from that low state up to above 50% then back down under 50% to allow usage, you’re either in a good enough position to trigger a Full Rest or the 40 second timer has elapsed.
The takeaway from all of this is to use the Recover Stamina skill tactically. Using her animations, despite wasting a bit of time, can give you knowledge as to your stamina state. Certain routes reward you by waiting until you’re at critical stamina to use both charges of the skill pushing through a hard crux, while in other instances it would make sense to spread out uses through a longer section. You can also use it to ensure safe, efficient climbing to a Full Rest position or other check point that also resets the skill.
Chalk Rest
We've discussed Chalk as a buff but there's another important mechanism in play when actually applying Chalk. As soon as you hit the Chalk button it acts like a mini version of the ‘Recharge Stamina’ skill and increases limb stamina by about 20%. Even though uses of Chalk are only consumed from hand holds, all 4 limbs benefit from the Chalk buff and all 4 limbs receive this small stamina boost. The only limit to this stamina boost is the amount of chalk usages you have remaining. Infinite chalk serves as a great tool for climbers to learn harder routes with extra stamina boosts then scale back chalk usage. As with the Recover Stamina skill after the very brief instant the stamina boost is applied the physics of her position immediately begins affecting limb stamina. This means that while the animation is happening you can be subject to rapid stamina drain and have zero ability to move Aava at all. That’s why in really bad positions Recover Stamina uses and chalk application alone barely stave off a fall. However, you can actually apply Chalk immediately after pressing the Recover Stamina button and the game will partially skip the Chalk animation and save you a bit of time. Once again you can apply this tactically and align both boosts and the subsequent Chalk buff to push through hard cruxes or spread out your uses of both for longer endurance sections.